Once upon a time I started my very first blog. Although that one is retired, it was a wonderful learning experience and gave me the confidence to start the two sites that I manage today. Rather than filing all the old posts away, I’ve decided to bring a few back from the archives, including one of the most popular – DIY Baby Ladybug Costume. Enjoy!
CRAFTS & SEWING
DIY Baby Ladybug Costume
October 1, 2014
The following content may contain affiliate links. If you purchase something from the links, we may receive a commission.
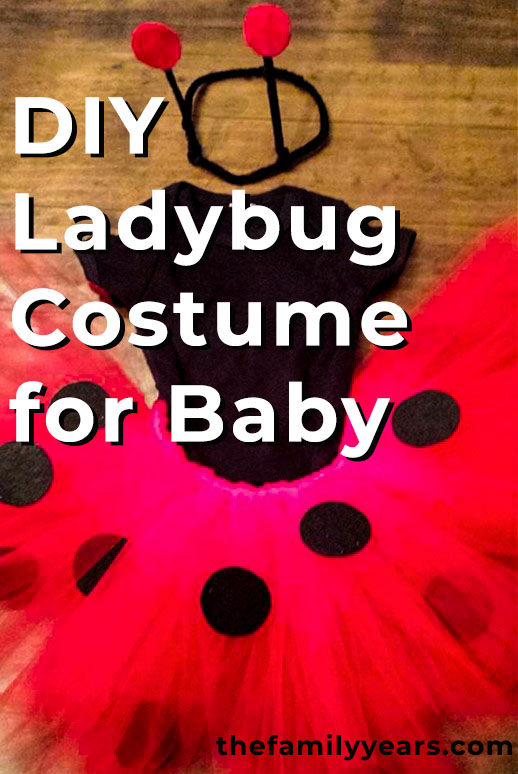
Halloween is just around the corner and this easy DIY Baby Ladybug Costume tutorial will have your little one ready to trick or treat!
DIY Ladybug Costume for Baby
Even if your little one isn’t quite ready for trick-or-treating, dressing them up for Halloween is a fun way to celebrate the holiday! By early August, Pottery Barn is already tempting us with their adorable selection and Target is getting their holiday aisles ready.
One thing experience has taught us is that when planning to buy a costume, the earlier the better. As the day draws closer, the selection really starts to dwindle down.
If a small fortune on a one-time wear baby Halloween costume is not for you, we have an inexpensive and simple alternative. A ladybug costume is an easy and adorable Halloween costume for a baby, but it also makes a great outfit for a ladybug party!
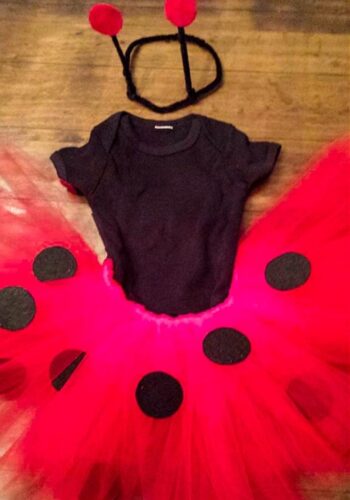
This ladybug costume consists of three parts – a black onesie, headband, and tutu. I opted out of making wings since most babies spend the bulk of their day lying down. However, if you are making this costume for a toddler, wings are a must and can be found at most party stores for pretty cheap.
We purchased all the materials needed for around $10. If you’re questioning whether you can do this, know that this project is so easy that I completed it with a sleeping baby on my lap. YOU CAN DO IT!
Materials for a Ladybug Costume
- Black onesie
- 25 yards of red nylon tulle (for a baby tutu)
- 3/4 inch elastic band
- One sheet of black stick-on felt
- One sheet of red stick-on felt (or 2 small red pompoms)
- Black pipe cleaners
- Scissors
- Measuring tape
- Pencil
- Small lid
- Safety pin
How to Make the Tutu
The first item to make is the tutu because it is the main part of the costume. If you are even a little crafty and the mother to a girl, learning to make a tutu is a great skill to have. Not only is it easy, but there are so many fun costumes that can be made from it.
1. To begin, measure the waist of the baby.
2. Then cut that length of your elastic band plus two inches. As you start to make the tutu, the elastic stretches less so it’s nice to have a little extra wiggle room. If you find at the end that you don’t need the extra elastic, you can cut it off, but it’s better to have it available, just in case.
3. Next, decide how long you would like the tutu to be. The best way to determine this is to measure from waist to knee, ankle, etc. For our tutu, I decided that ten inches would work best. Whatever desired length you decide on for the tutu, double that number. If you want a ten inch tutu then you will need twenty inch tulle pieces. *After completion, I changed my mind and ten inches seemed too long for her. If this happens to you, don’t panic, carefully trim off the amount from the bottom of the tutu.
4. Measure out the tulle and cut strips to the desired length. I like to cut out 10 – 20 strips at a time. You can cut the entire roll or work in sections.
5. When starting the tutu, you can begin on one side or the middle. It really doesn’t matter as long as you make sure to leave about an inch on each side open. I started in the middle. Taking the tulle, fold one piece in half. Lay the elastic band on top of it and pull the tail end pieces through the loop. Pull to secure the knot. TIP: It doesn’t matter if you pull through over or under, but you need to remain consistent. If you accidentally do some both ways, you will end up seeing some of the knots on the finished side.
6. Continue adding the tulle pieces until there is about an inch left on each side. Pull the knots closer together for a fuller look.
7. Next, we need to add some spots. Flip the black felt over and trace small circles on the back. I used a lid from a container of vitamins. Cut out a dozen or so small spots, depending how big or small your lid is. It’s ok if the spots aren’t perfect. What real ladybug has perfect spots anyways?
One by one, peel the felt circles off of the sheet. Press the felt side up circle onto a strand of the tulle. You may have to double up the tulle underneath to absorb all of the stickiness from the sheet. Continue adding the spots throughout the tutu.
8. Once all of the spots are added, you have to decide how you would like to close the tutu up. For our tutu, we used a safety-pin so it can be easily adjusted larger or smaller if desired. For a more permanent solution, you could sew the two end pieces together or add Velcro to each end. Whatever you decide on, give yourself a pat on the back. The hard part is over.

How to Make the Ladybug Headband
Now the only thing left to make is the headband.
1. Take the black pipe cleaner (I needed two pieces) and wrap it around the child’s head to get the desired size. Twist the ends together, connecting the two pieces of pipe cleaner together to make a circle.
2. For the antennas, cut two more pieces of pipe cleaner. These should be no more than four to six inches long. Take one of the pipe cleaners and wrap one end around the pipe cleaner headpiece so it sticks up. You will need to wrap it several times to achieve this. Do the same with the other pipe cleaner about three to four inches away from the first one.
3. There are two easy options you can do for the tops of the antennas. The first is to attach a fuzzy pompom to the top with a hot glue. In hindsight, I would’ve preferred this method. The other option is to cut out four small circles out of the red felt. You will use two circles per antenna. Remove the felt from the backing and press one of the circles about half an inch down onto one of the antennas. Flip it over and press another circle onto the first circle sticky side down. Continue on the other side.
There you have it – one easy (and cheap!) DIY baby or toddler ladybug costume complete!
IF YOU ENJOYED THIS DIY BABY LADYBUG COSTUME, YOU MAY ALSO LIKE –